

How To Change The Color Of A Shirt Using Photoshop
There are many dissimilar types of layers in Photoshop that you may want to modify the color of. Since each blazon of layer requires something different for changing the color, you're not alone if y'all feel a bit overwhelmed. Luckily in this tutorial, you'll acquire the easiest ways to change the color of any layer yous're working with in Photoshop. To start things off hither's the about basic way of changing the color of a layer.
To change the colour of a layer in Photoshop, create a Hue/Saturation Aligning Layer and place it above the layer y'all wish to edit. Now right-click on the adjustment layer and press Create Clipping Mask. Side by side, opening the Hue/Saturation options, adjust the Hue Slider to change the colour of your layer.
You lot volition learn more virtually the Hue/Saturation adjustment later in this post; however, there are some easier colour-changing methods available. For text or shape layers, changing the color with the color fill settings will provide a much amend result.
And so, permit's get started with changing the colour of an image layer showtime!
How To Change The Color Of An Prototype In Photoshop
In this example, I volition show you how to change the color of an object in your image selectively. By selecting the proper color channel, this process is extremely fast and beginner-friendly!
Pace 1: Create A Hue/Saturation Aligning Layer
To start things off, create a new Hue/Saturation Adjustment Layer and place it above your image layer. This aligning layer tin can be made via the Adjustments Console or via the adjustment layer options at the bottom of the Layers Panel.


Stride 2: Add together A Clipping Mask To The Adjustment Layer
A clipping mask will ensure your color-changing adjustments will only affect the image layer directly below it. This becomes very important when you have multiple layers in your project!
To create a clipping mask, right-click on the Hue/Saturation Aligning and select "Create Clipping Mask."
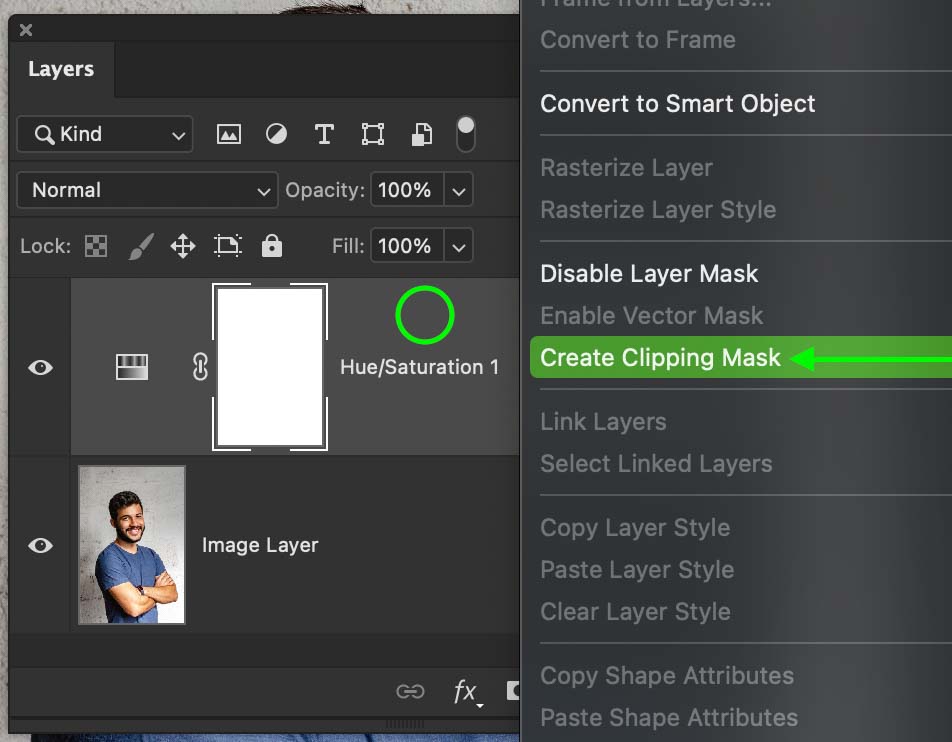
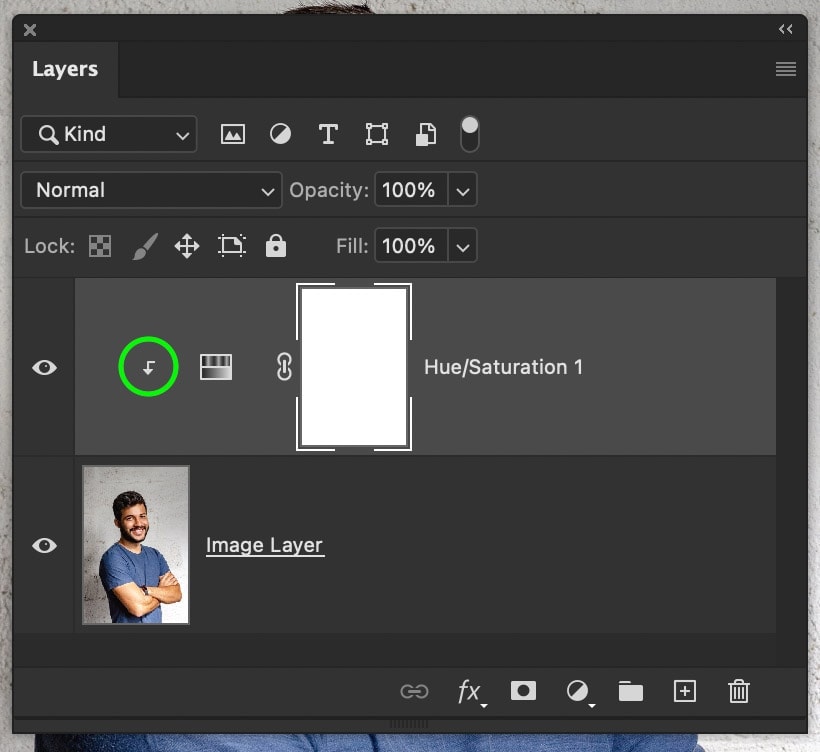
Once applied, y'all volition meet a right-angle arrow pointing down to the image layer. This means the clipping mask is agile, and your adjustment will only affect the one layer information technology's clipped to.
Step 3: Find The Color Channel You Wish To Edit
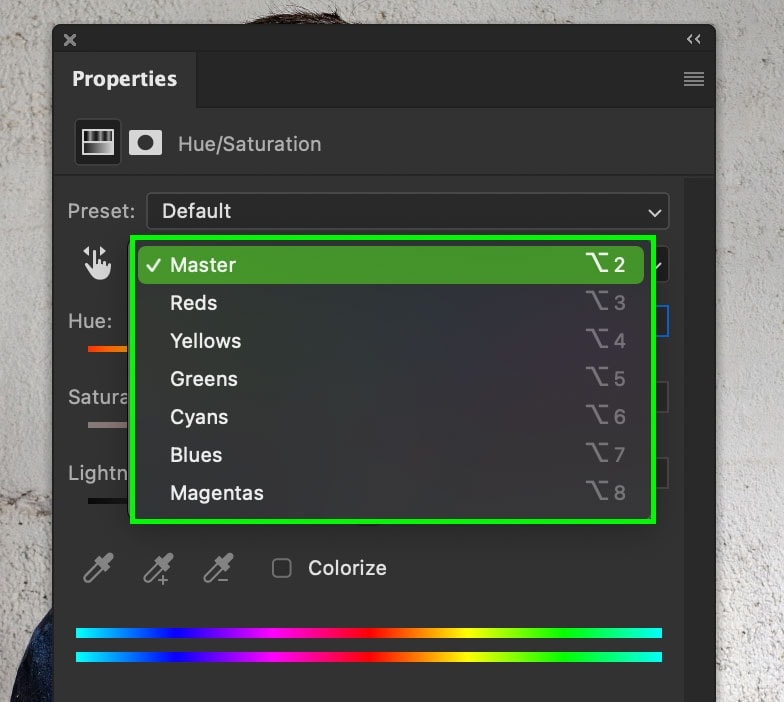
At present let'southward starting time changing some colors! Before yous get-go, you lot need to figure out which colour channel the colors you desire to change are located in. In this example, I desire to change the colour of his blue shirt. That means it'south a safe bet to presume I'll need to use the Blueish color channel.
Double-clicking on the Hue/Saturation Adjustment to open the adjustments options, click on the Channels option. Then locate the channel that your colour fits in. In my example, I will select blue (the color of the shirt), but this may be unlike for your image.
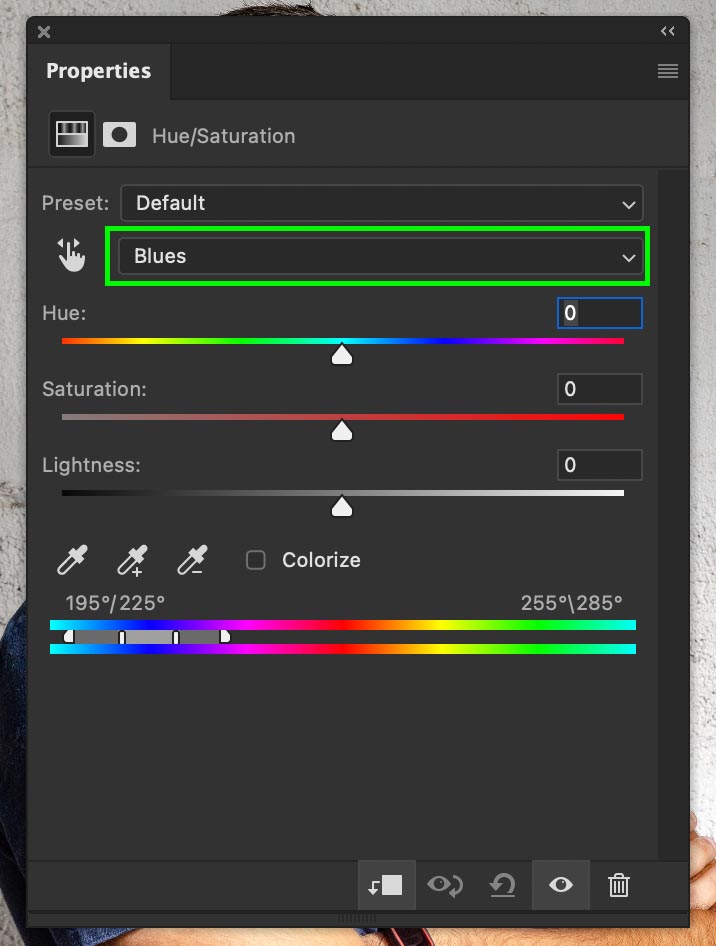
Once yous've selected a color aqueduct, y'all can make sure that information technology is correct by bringing the Saturation slider to +100. Anywhere that you see condign extremely saturated will be affected past your hue adjustments in the adjacent step.
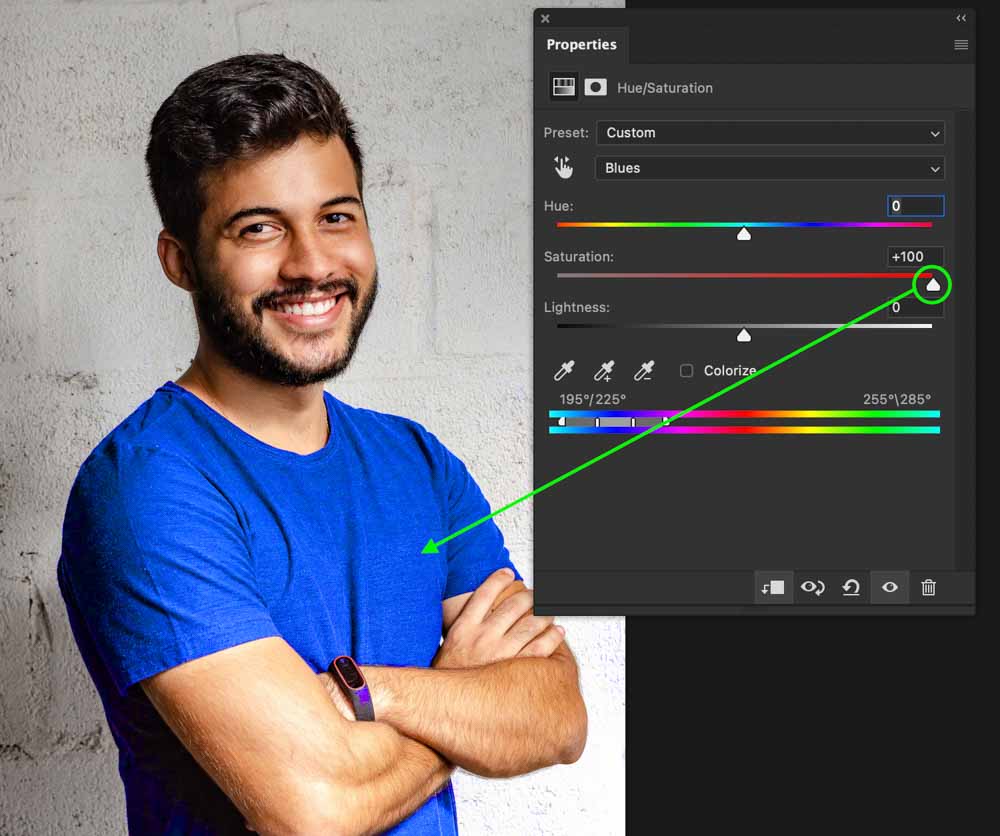
As you tin can see in my epitome, the entire shirt looks very saturated, meaning I am in the perfect color channel! Once you place that you're in the correct color channel, reset the Saturation back to 0.
Step 4: Arrange The Hue Slider To Change The Color
To change the colour of your selected color channel, adjust the hue slider to your desired color. This volition change the colour of your layer to a completely different hue. For example, since I accept the bluish channel selected, I am only changing the colors of the blue hues in the paradigm.
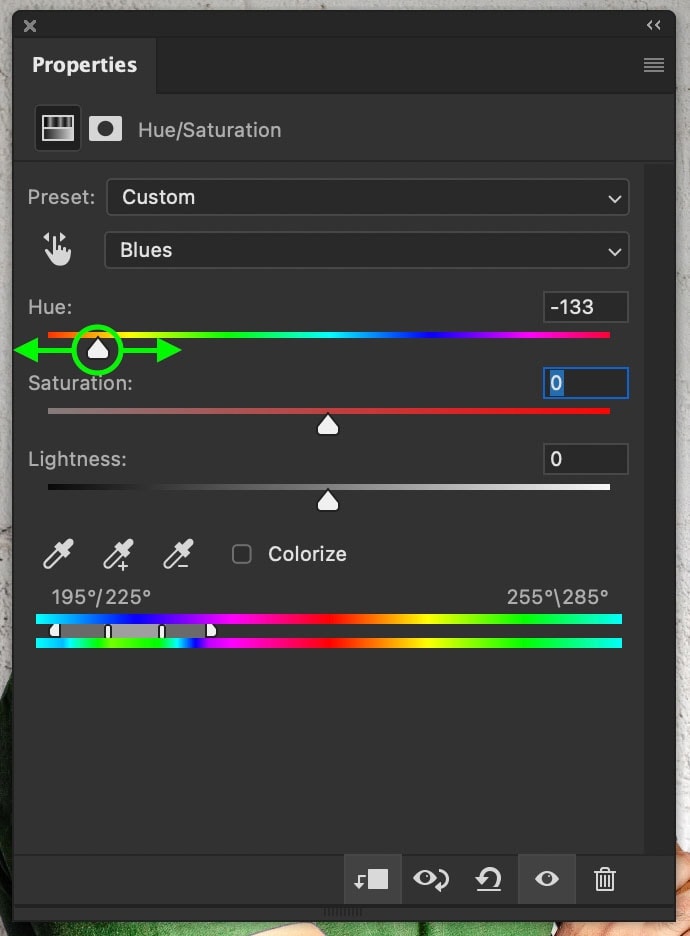
This way, all the other colors in the background and his skin tones remain untouched!
Step 5: Conform The Saturation And Lightness To Refine The Color
Later on you lot settle on a new hue, you can further change the color of your epitome layer with the Saturation and Lightness sliders.
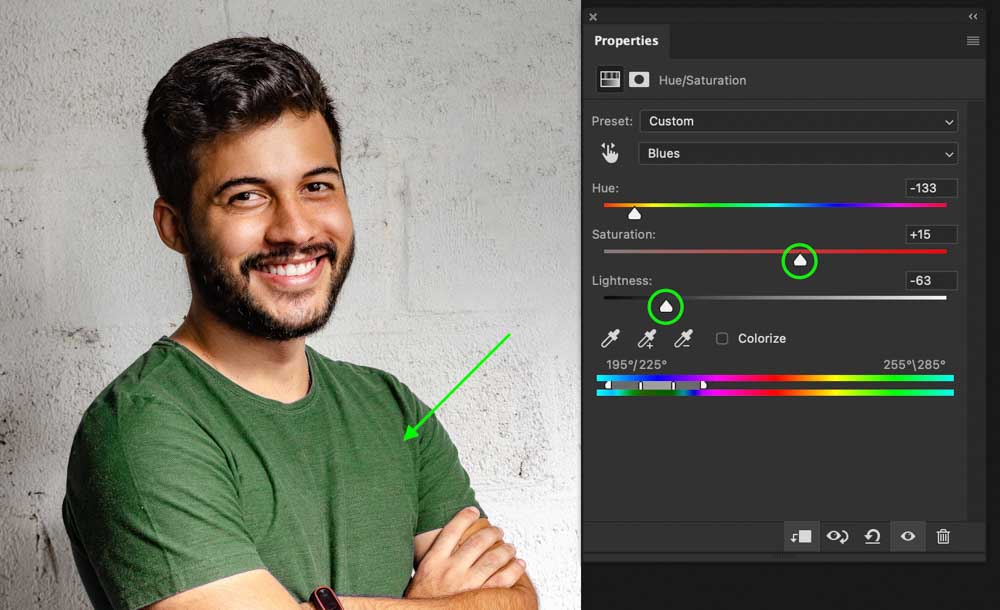
The Saturation slider will make your colors appear richer by increasing it.
Meanwhile, the Lightness slider volition make colors wait brighter or darker. This tin can be helpful if you want a more pastel tone in your photo.
If you're happy with the color later your hue adjustment, then great! You lot tin exit these two sliders untouched.
You're Washed!
With those v steps, yous have successfully changed the color of an prototype layer in Photoshop. Since you can target your private color channels, it'southward easier than ever to change colors selectively in your photograph. This technique works exceptionally well for changing the colour of wearable, cars, or other objects in your photos.


In some situations, you may meet trouble and change colors that you didn't want to edit. For example, if you were editing a blue shirt against a blue background, both of those colors would change. This requires a different technique using selections and layer masks to solve the problem. I outline everything you need to know about that in this tutorial.
Are you looking to change black to color in Photoshop? Check out this post to larn how!
How To Alter The Color Of A Shape Layer In Photoshop
To modify the color of a shape layer in Photoshop, select your shape layer and activate the Shape Tool (U). In the upper settings bar, click on the "Fill" choice and choose a new colour from the provided swatches. Your new selected color will be practical to the shape to alter the color.
Let'due south break that downward more in-depth.
If you haven't already washed then, you need to create a shape layer. Afterwards selecting 1 of the Shape Tools (U), click and drag on your canvas to create a new shape.

Now brand sure that the shape layer is selected in the Layers Panel.

With the Shape Tool still active, go to the upper setting bar and click on the "Fill" option. The fill controls the color of any shape layer you piece of work with in Photoshop.

In the fill console that appears, you tin can choose between whatsoever of the preset swatches for quick color changes.

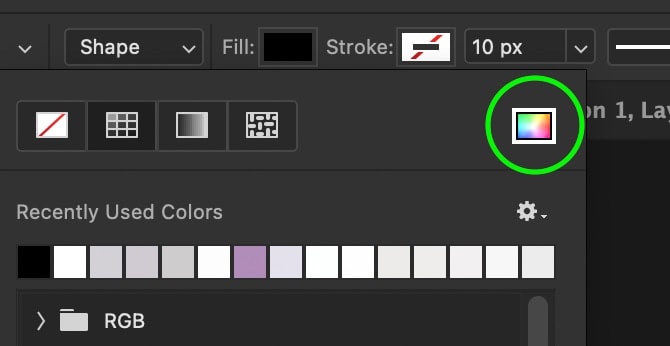
Nonetheless, if y'all want to change the color of your shape layer to something more specific, then click on the color picker icon in the right corner.
You can manually select a new color for your layer in the colour picker that appears by clicking on the colour palette. Once yous're happy with the color, click OK to change the color of your shape.

And just like that, y'all have quickly changed the color of a shape layer in Photoshop!

There is a lot more than to comprehend with irresolute the colour of shapes beyond just solid colors. If you desire to learn how to utilize gradients, custom colors, or transparency fill up to shapes, bank check out this post.
How To Change The Color Of A Text Layer In Photoshop
To change the colour of a text layer in Photoshop, select the Type Tool (T) and click and drag over your text to highlight it. In the upper settings bar, click on the "Fill" pick and select a new color for your text. Lastly, press the checkmark in the upper bar to save your changes.
That is the near bones style of changing the color of text in Photoshop, simply let's discuss a more efficient way of doing things.
First, you need to create a new text layer. Selecting the Blazon Tool by pressing T, then clicking on your canvass, you can apace add a new piece of text.


New to working with text? Cheque out this complete guide to text layers in Photoshop!
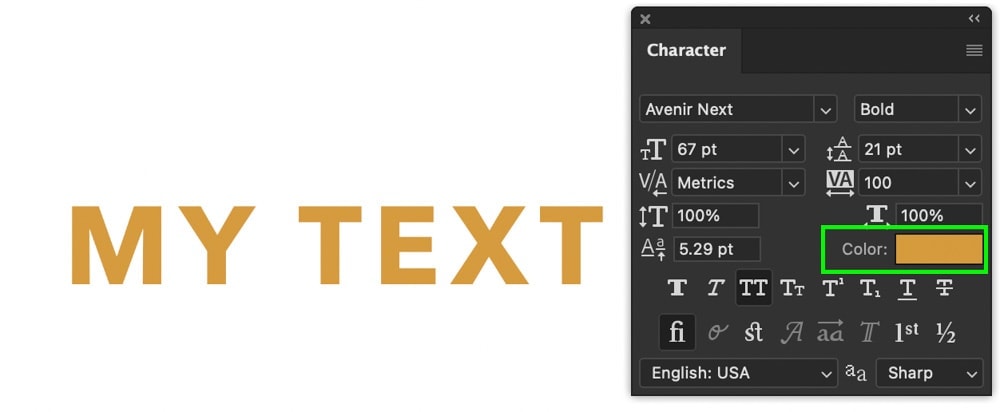
One time created, make sure your text layer is selected in the Layers Panel, and then go to Window > Character to reveal the Character Console.

The Grapheme Panel is dwelling to all types of custom text adjustments such equally changing fonts, graphic symbol spacing, kerning, and even changing colors!
Since you need to change the color of the text, click on the "Color" selection to reveal a color picker.

You lot tin hands select a new colour to add to your text layer in the color picker that appears. Then, once you're happy, click OK to apply the updated text color.

Y'all do non need to select or highlight your text with the Character Panel to alter the color. Information technology makes way for a more than efficient workflow and is slightly less confusing since you lot don't need to have any specific tools agile.
Now, if you're looking for more unique text colors to use, try adding a slope to your text!
How To Change The Color Of The Background Layer In Photoshop
When you showtime open a new project in Photoshop, you'll begin with a background layer. In many cases, this background layer defaults to white, but what if you want to change this to a custom colour? Depending on whether you are creating a new project or working on an existing project, there are two methods to effort.
Method 1: Changing The Background Color For A New Projection
In the new document dialogue box, you tin customize all the dimension and resolution values for your project. You tin also change the color of your background layer earlier it's ever created!

In the "Background Contents" selection, you can select betwixt five different background options:
- White
- Black
- Background Color (which is your currently active background colour in the Photoshop workspace)
- Transparent
- Custom
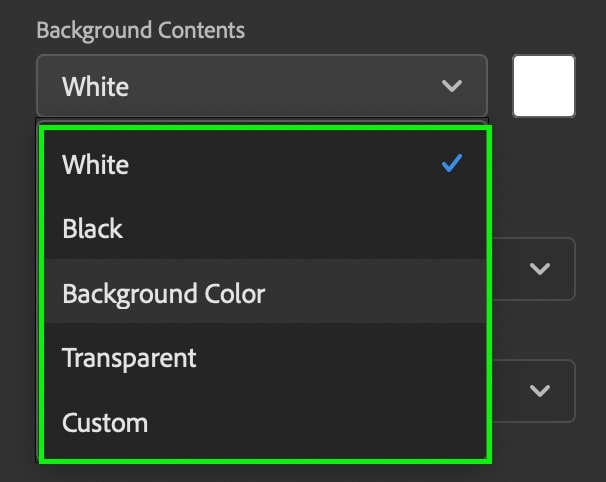
Well-nigh of these options are pretty self-explanatory, so simply select whichever groundwork colour you wish to use. If the color you want isn't provided, click on "Custom" and choose a custom color from the color palette that appears. With these simple options, you tin can change the background layer color earlier your project is even created!

Method two: Changing The Background Color In An Existing Project
Now, if you already have a project created, your background layer color will already be called for you. Luckily it's simple to alter with a keyboard shortcut.

First, click on your foreground color at the bottom of your toolbar and select a new color to fill your background layer with.


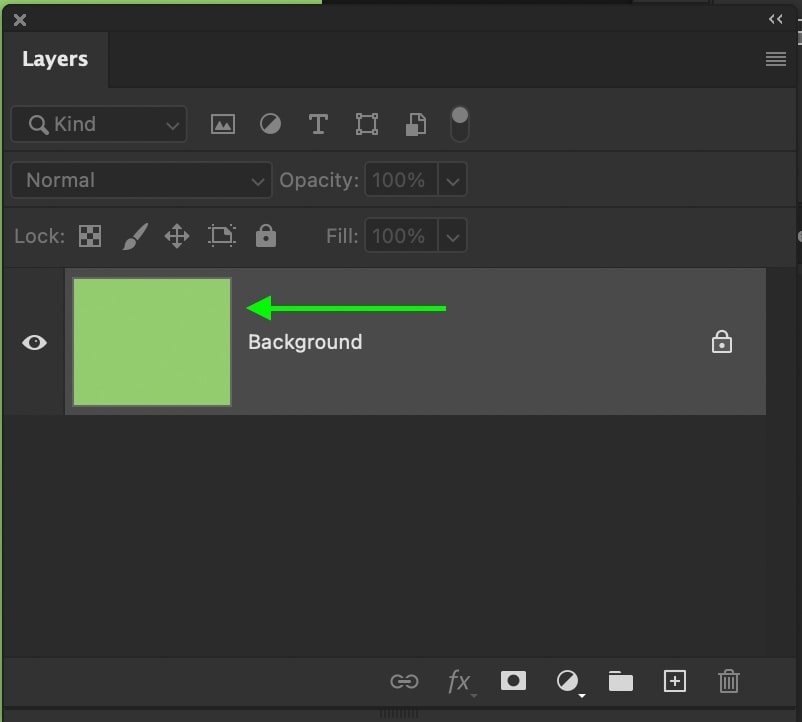
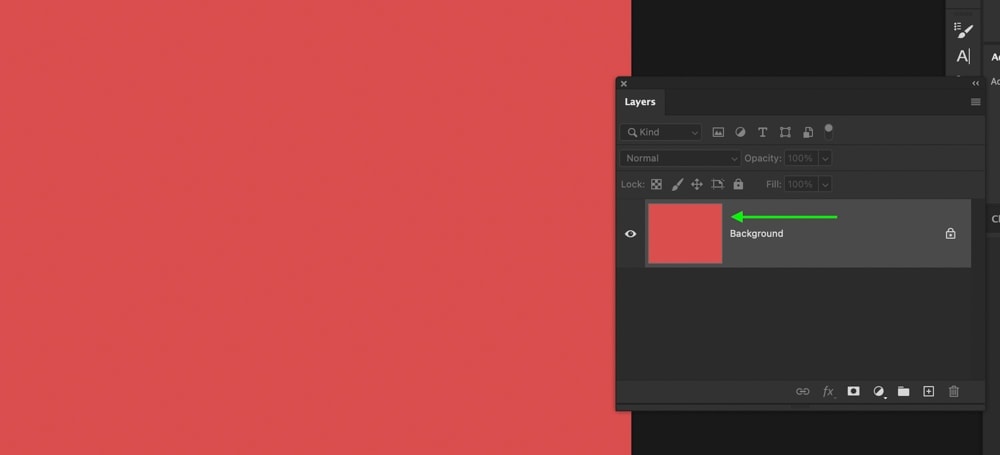
Now that your foreground colour is set, ensure that your background layer is selected in the Layers Console.
Then to apply your new color, printing Alt + Delete (PC) or Choice + Delete (Mac) to fill the layer with your foreground color. Fifty-fifty if your layer is locked, it will fill the background with your updated color instantly.
If y'all want to change your groundwork layer color over again in the future, you tin can exercise so with the same steps at whatever time.
How To Change The Color Of Fill Layers In Photoshop
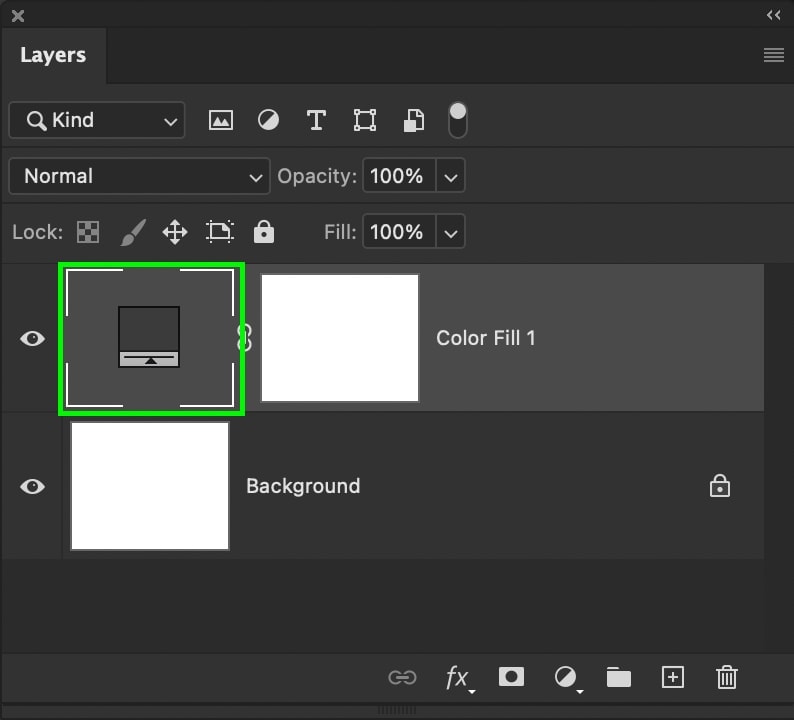
To alter the color of a fill layer in Photoshop, double click on the fill layer thumbnail in the Layers Console. Then, select a new color for the make full layer in the colour picker that appears and click OK. This volition update your make full layer color and apply information technology to your project.
Fill layers are bully for changing the colour of a background or using with a clipping mask to change the color of objects in your project. To create a new fill layer, simply go to Layer > New Make full Layer > Solid Colour.

In the color picker that appears, you can change the color easily by clicking to select a new color. Once you're happy, click OK to add your selected color to your color fill layer.

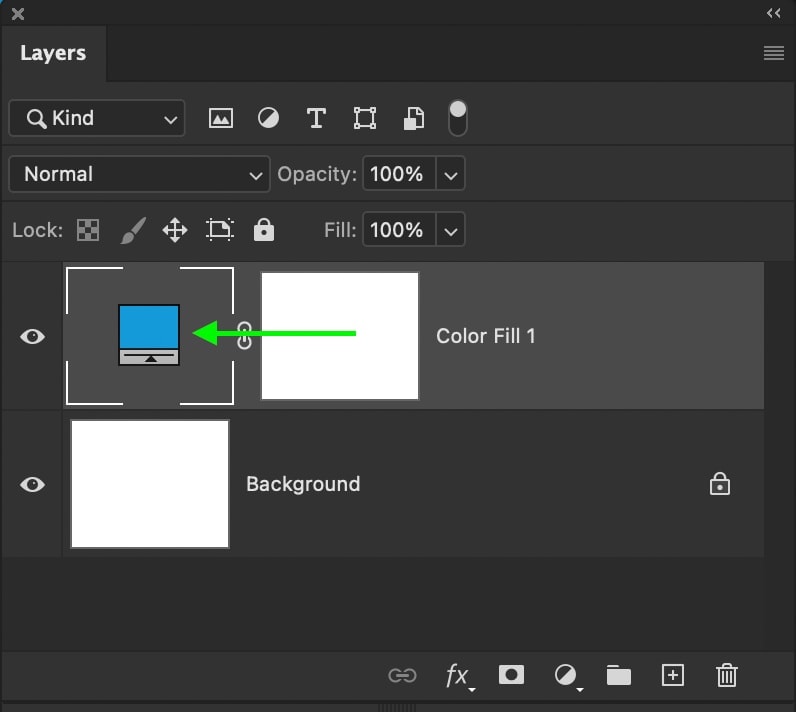
If you change your mind and want to edit this color fill layers color, double-click on the make full layer thumbnail to reopen the color picker.
Here yous can update and change the color but like yous did when first creating the color fill up layer. Click OK to apply the updated color.

And with that, yous have chop-chop changed the color of an existing colour fill layer in Photoshop! These same steps can be applied at any time during your projection.
It's worth remembering that double-clicking on any fill layer thumbnail will allow y'all to edit it, including slope and blueprint fill layers.
How To Make full A Transparent Layer With Color
To fill a new layer with a color, click on your foreground color at the bottom of the toolbar and select your desired colour. With your color chosen, select your new layer and press Alt + Delete (PC) or Option + Delete (Mac) to fill the layer with your active foreground color.
This process is very similar to changing the color of an existing background layer as you learned previously in this tutorial.
Afterwards creating a new layer, make certain it is selected in your Layers Panel.
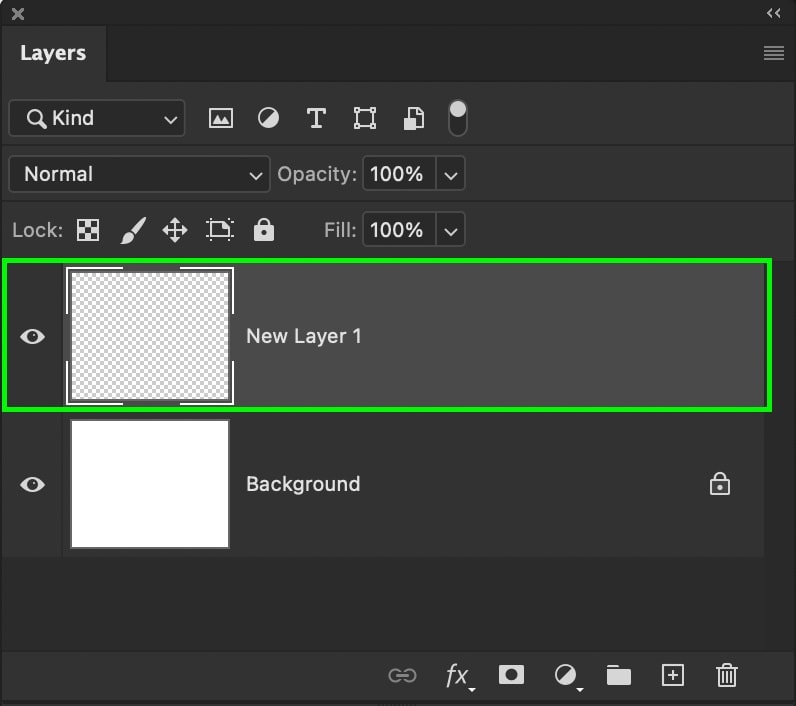
And then click on your foreground color to reveal the color picker and cull a colour to fill your new layer with.

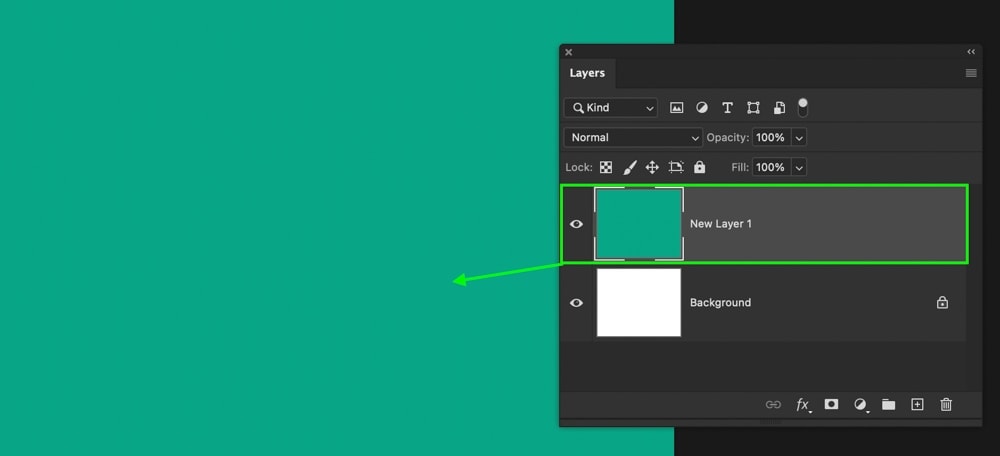
With your colour chosen, press Alt + Delete (PC) or Option + Delete (Mac) to fill your selected new layer with the solid color.
Now you know the ins and outs of changing the color of layers in Photoshop from images, shapes, text, and more! The procedure for each is pretty fast to achieve once you lot call back all the steps. Later on you have everything nailed downwardly, these color-changing tips will come in super handy for all of your hereafter Photoshop endeavors.
Happy Editing!
Brendan 🙂

Source: https://www.bwillcreative.com/how-to-change-the-color-of-any-layer-in-photoshop/
Posted by: clementebutcheall.blogspot.com
0 Response to "How To Change The Color Of A Shirt Using Photoshop"
Post a Comment